


")
Contact
Helpdesk
phone: 0345 55 21 888
helpdesk@itz.uni-halle.de
Kurt-Mothes-Str. 1
06120 Halle (Saale)
Sie erreichen uns
Montag - Freitag von
9:00 Uhr - 15:00 Uhr
Linux
Configuring your computer to connect to our Wi-Fi network consists of two steps: 1. Downloading the required CA certificate, 2. setting up the connection itself.
Download Certificate
Download the required CA certificate by right-clicking on the following link and choosing "Save link as…."
Save the file to your hard drive. Please take care not to move or delete the file; you need it in order to connect to our network.
Please make sure to press the right mouse button and choose "Save link as ". If you press the left one, the certificate will be installed in your browser's certificate store, which is not what we want here.
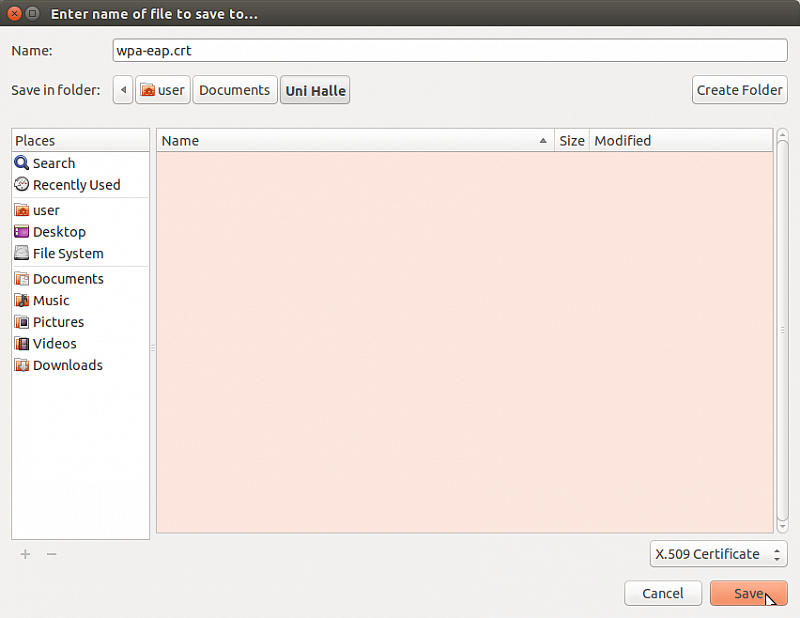
In this case the certificate chain will be saved to "~/Documents/Uni Halle/wpa-eap.crt". ("~" is the current user's personal folder.)
Set Up the Wireless Connection
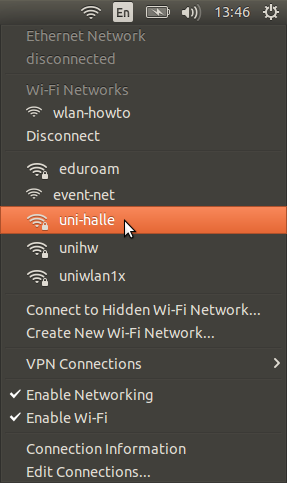
Select the network "uni-halle" from the list of available Wi-Fi networks. A new window should appear, asking you to configure the network's authentication settings.
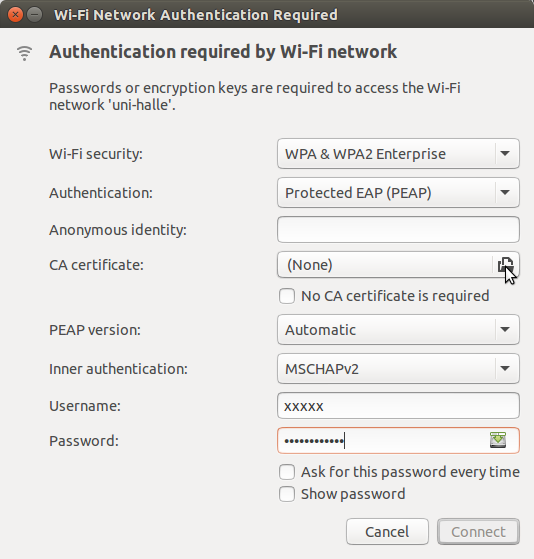
Use "Protected EAP (PEAP)" as authentication, "MSCHAPv2" as inner authentication, and have the computer choose the PEAP version automatically. Leave the field "Anonymous identity" empty.
Enter your five-letter username in the field "Username". Enter the password you received from the Service Portal into the "Password" field.
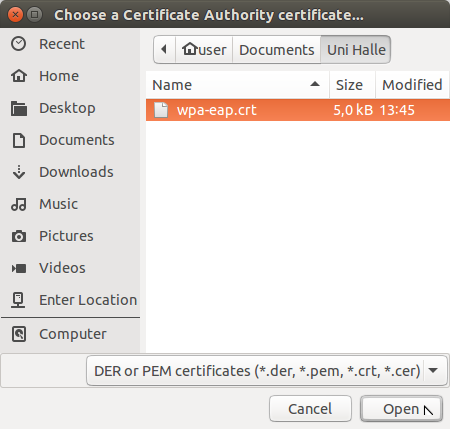
In the field "CA certificate", select the certificate file you just downloaded. In this case, we use the file "~/Documents/Uni Halle/wpa-eap.crt" we downloaded earlier.

The complete authentication settings can be seen in the picture to the left. Click "Connect" in order to establish the connection to our Wi-Fi network.
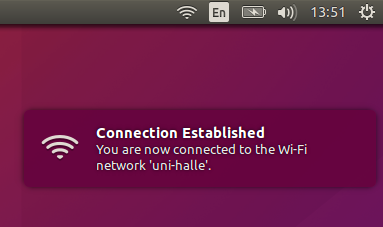
As soon as you see the notification on the left, the network connection has been established successfully.
Manual configuration using wpa_supplicant
If you want to connect to the Wi-Fi network manually instead, create the following wpa_supplicant profile:
network={
ssid="uni-halle"
key_mgmt=WPA-EAP
proto=WPA2
eap=PEAP
phase2="auth=MSCHAPV2"
ca_cert="/home/xxxxx/Documents/Uni Halle/wpa-eap.crt"
identity="xxxxx"
password="YYYYYYYYYYYY"
}
Please set the ca_cert-, identity, and password values accordingly.